How to Make a Junk Journal from Paper
- Samantha McNesby
- Jul 9, 2021
- 3 min read

One of the things I love about junk journaling and art journaling is that there are so many ways to begin! for this project, we’re going to go very simple and make an entire journal from 6 sheets of paper.
Notes: There is a video tutorial for this project, scroll down to watch.
I recommend using presentation paper for the pages and 110 lb card stock for the cover. See more about paper and printing here.

I'm using the Pink Sugar mini jour all kit for this project, but the technique will work for any paper you’d like to use. The kit can be found in the shop here— and is free for premium subscribers.
Subscribe and Save on Junk Journal Kits and Projects
Premium members get this kit (and dozens of others) free, learn more here.
How to Make a Simple Junk Journal
Print or gather your paper. If you’re using the kit, print 6 pages of backing papers, use any combination action you like. This will prevent your journal from having blank spots. If you're not using a kit, then you'll need to cut 8x8" pieces of paper.

Place these sheets back into the printer so you can print on the reverse side. The goal is to end up with 6 double sided sheets. If you’re using the pink sugar junk journal kit, your side 2 pages will feature 2 parts. The big square is 8x8” and what you will use to make the pages. The pieces along the bottom are extras for decoration and can be trimmed off and set aside.

Cut the big squares out and set aside the smaller pieces until later.

The 8x8” squares are easy to cut, just trim along the outside edges. If you’re using different paper, measure and cut 5-6 8x8” papers that coordinate or that you like together.
Fold the Pages
Fold each sheet as shown below. You can do 5 or 6 sheets, depending on how thick you want the book to be.

For each piece, fold in half diagonally, then open up and fold in the other diagonal direction.

This will leave crease marks on the paper. The creases make it easy to find the page center and to complete the folding.
Fold the points in towards the center. This will give you a smaller square with flaps as shown above. Repeat for all pages but the cover.

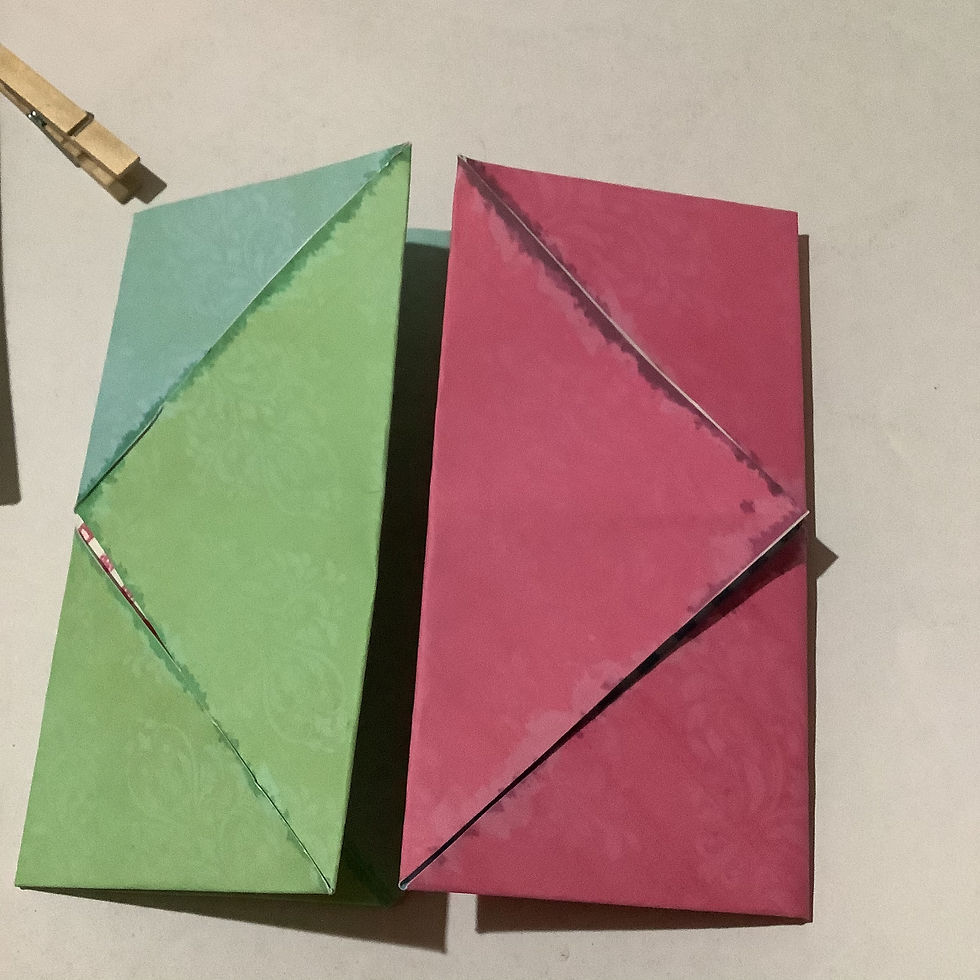
Fold each page in half to make a rectangle. There will be triangle shaped flaps on each side.
if you need to see how the folds work, the video tutorial for this project is here and linked below.
These are different papers (they are from the Oddities Junk Journal Set, found here), but the steps are the same.
Glue the Papers Together
Next, glue the papers together in a line -- you can arrange them as you'd like first -- since each is a different color or pattern, different layouts will yield different results.

Lay two folded pieces together, and glue the triangle flap of one too the other. Glue just the flaps, leave the rest free. Clip with clothespins or paper clips to hold until the glue dries.

Repeat for all 6 folded pages. You should end up with one long strip, connected by the triangles. Fold it up and clip to hold. You can use clips as shown or put it between two heavy books to flatten it out as much as possible while you work on the cover.
Here is a long strip of folded pieces from a different color version of this kit:


Make the Cover

Cut all around the edges of the cover. Note it is an irregular shape with cut outs at each corner.

Fold all edges, then place the cover face down. My cover has a backing of roses -- yours may look different depending on what paper you chose.
Bend up the top and bottom pieces and glue in place. leave the sides free for now. You can find a video tutorial of the cover assembly here; it is also shown below.
Add the Pages
Place the folded page pile inside the cover. Glue one triangle end to each side of the interior cover. Clip in place.

Glue the last flaps inside of the cover down and clip to secure. Let the whole thing dry.

Fill the pockets with the ephemera and embellishments you set aside on step one, then personalize as you'd like.
FInd the Pink Sugar Kit here -- it is also part of the premium subscription plan and can be downloaded free by members.


Comments